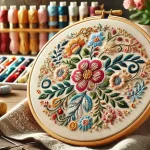
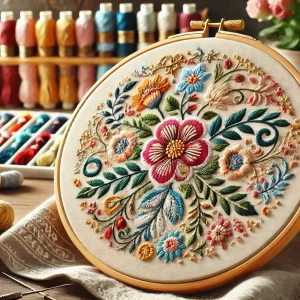
Creating top-notch embroidery designs isn’t just about aesthetics—it’s about precision, planning, and using the right tools and techniques. Whether you’re an embroidery enthusiast or a professional looking to refine your skills, these 17 expert tips will help you achieve clean, high-quality results every time.
1. Follow Design Guidelines
Start by understanding your embroidery machine’s capabilities. Different machines support different stitch types, densities, and fabrics. Ignoring these can result in thread breakage or puckering. Always review your machine’s manual and design software guidelines to stay within the recommended specs.
2. Utilize Embroidery Designs Templates
Templates make design placement easier and more accurate—especially on items like caps, shirts, and bags. Use them to align your design perfectly and avoid misplacement errors that can waste time and fabric.
3. Mind the Embroidery Designs Dimensions
Size matters! Oversized designs can look overwhelming, while designs that are too small may lose important details. Measure your stitching area and aim for a balanced design that fits the space without compromising on clarity.
4. Keep Designs Simple
Bold and clean always wins in embroidery designs. Intricate designs often translate poorly into stitches. Stick to simple shapes and solid patterns for clean, readable embroidery that pops.
5. Optimize Color Selection
Choose thread colors that complement your fabric. A good rule of thumb is to use high contrast (e.g., white thread on navy fabric) for clarity. Always test your colors on fabric swatches first to see how they interact under different lighting.
6. Use Solid Colors, Not Gradients
Embroidery Designs doesn’t handle gradients well. Instead, mimic shading using stitch density variations. This keeps your designs vibrant and within the functional limits of embroidery.
7. Avoid Small Text and Thin Lines
Tiny text and thin lines can easily become distorted. Stick to fonts that are at least 0.25 inches tall and use bold strokes for legibility. Test on scrap fabric before running the final stitch.
8. Limit the Number of Colors
Too many color changes can slow down production and introduce errors. Stick to 3–5 colors that work harmoniously with your fabric for a clean, efficient embroidery process.
9. Incorporate Bold Lines and Clean Shapes
Simple, bold lines translate best into embroidery stitches. Avoid overlapping or overly intricate elements. Use vector graphics software to ensure clean, scalable shapes.
10. Avoid Tiny Details
Tiny features are tough for any embroidery machine to replicate. If you need intricate elements, consider alternative techniques like appliqué or layering to maintain the visual impact without overwhelming your machine.
11. Manage and Plan Color Changes
Group similar colors together and plan your color changes in advance. This improves efficiency, reduces downtime, and minimizes the chances of misalignment during stitching.
12. Choose the Correct Size Design
Make sure your design fits well within the embroidery hoop. Designs that are too big or too small can lead to stretching, shifting, or uneven results. Measure first—always.
13. Select Appropriate Stabilizers
Stabilizers are key to keeping your fabric steady during stitching. Use tear-away stabilizers for firm fabrics, cut-away for stretch materials, and wash-away for delicates. The right stabilizer prevents puckering and enhances the finished look.
14. Use the Right Needle Type and Size
Your needle choice matters. Use ballpoint needles for knits to avoid snags, and sharp needles for woven fabrics. Match needle size to your thread and fabric to prevent damage or poor stitching.
15. Print Out Your Design Template
Before you start stitching, print your design at actual size. This allows you to preview the layout and make necessary adjustments. It’s a small step that prevents big mistakes.
16. Stitch at a Slower Speed for Quality
Slow and steady wins the race—especially in embroidery. Slower stitching ensures better accuracy, fewer mistakes, and a more polished final product, especially with delicate fabrics or detailed designs.
17. Partner with a Professional Digitizing Service
Complex designs require expert digitizing. A professional digitizing service, like Nice Digitizing, ensures your designs are converted into machine-ready formats with optimal stitch settings. Save time, reduce errors, and get flawless results with every project.
Final Verdict
Mastering Embroidery Designs is a blend of art and technique. By applying these 17 tips, you’ll not only improve the quality of your work but also increase efficiency and reduce costly mistakes. And when you’re ready to take your designs to the next level, Nice Digitizing is here to help with expert embroidery digitizing services tailored to your needs.
FAQs
Q: How do I select the right fabric for embroidery designs?
Choose fabrics that match the complexity of your design and use the right stabilizers for support.
Q: Why is digitizing important in embroidery design?
Digitizing translates artwork into machine instructions, ensuring accurate, high-quality stitching.
Q: Can I create detailed designs on all fabrics?
Not all fabrics can handle high-detail designs. Use appropriate needles, stabilizers, and design techniques to adapt.
Q: What software is best for designing embroidery patterns?
Wilcom, Hatch, and Brother PE-Design are among the top choices for professional-quality designs.
Get Custom Embroidery Digitizing – Fast, Affordable, and Professional
Submit your artwork and get a free quote in just 5 minutes! Whether it’s for logos, patches, caps, or 3D puff designs, we deliver accurate, clean, and quick results.
👉 Get a Free Quote Now
🧵 Embroidery Digitizing | 🖼️ Vector Art | 🧢 Logo Stitching